Building a Install and Recovery Drive for Your Hackintosh
Posted on 15th March 2014
![]() Running a modern Hackintosh has become fairly simple and straightforward these days. With the help of websites offering everything from installers to hardware compatibly charts, building a dream Mac is easily done. There is still a chance that something could break. It could be caused by a bad install, update, or even worse, a bad hard drive. What is fairly difficult is the fact that running hard drive diagnostics outside of a fully bootable Mac install may only allow you to test the physical drive. What about if is not a physical issue and is file system related?
Running a modern Hackintosh has become fairly simple and straightforward these days. With the help of websites offering everything from installers to hardware compatibly charts, building a dream Mac is easily done. There is still a chance that something could break. It could be caused by a bad install, update, or even worse, a bad hard drive. What is fairly difficult is the fact that running hard drive diagnostics outside of a fully bootable Mac install may only allow you to test the physical drive. What about if is not a physical issue and is file system related?
That is where a great program from real Mac fame, DiskWarrior comes in to play for most. Sure, OSX has a built in drive verification utility and you could boot into single user mode and run fsck, but what if those fail? What if you can not boot into OSX at all? DiskWarrior does give you a disk image that can be booted off of, if it is a real Macintosh computer. It will not boot on non-Apple hardware. So what do you do then?
You boot to your recovery install of OSX.
The idea is very simple, and may even sound like common sense. It is simple in thoery to say the least. What it going to be discussed, is how to create an install and recovery drive, external to the main system drives, bootable by USB and ready at a moments notice when the system gives you boot issues with the primary install of OSX.
This recovery drive gives us 2 primary ways to deal with a bad system. We can boot into a fully function install of OSX and try not only the built in tools from Apple, but can install other applications like DiskWarrior. If we can not repair the drive and have to re-install, the install image is also ready and available to boot to. Let’s just hope that if it comes to a re-install, you will have a good Time Machine backup to restore your data from.
Before we can proceed, a little bit of legal:
I am not responsible for the destruction of any hardware, software, or personal injury as a result of following this guide. This is a Try at your Own Risk project and is intended for educational purposes only. I am also not responsible for the downloading of illegally obtained software and leave the responsibility of any End User License Agreements (EULAs) on to the person(s) reading this article.
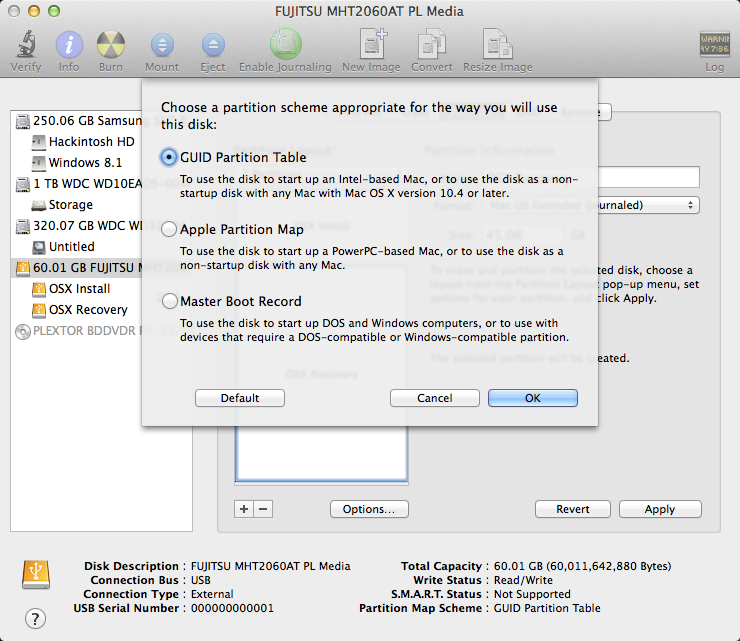
Set GUID and not Master Boot Record under Options.
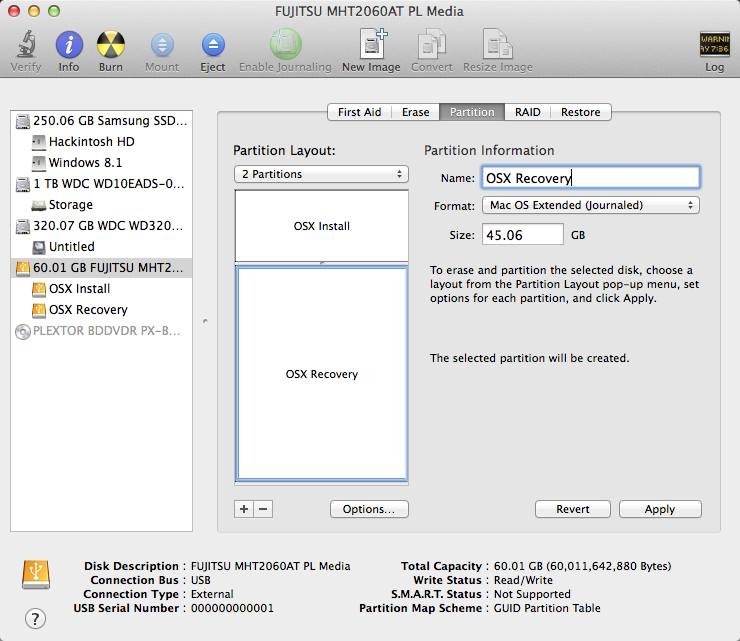
Create at least 2 partitions on the drive.
Essentially, what we will need to do first is to partition our external drive in to at least 2 partitions and set the drive as a GUID under Options. In this example, the 60GB external drive was created with the OSX Install having 14.95GB and the OSX Recovery having the remaining 45.06GB. Also, remember to make sure that the format is set to “Mac OS Extended (Journaled)” for both. These partitions will be sufficient for our purpose as well as when or if we need to update the installer and recovery to the next version of OSX.
Once the drive is partitioned and ready, we will begin by using UniBeast to created the install structure on the OSX Install partition. It will require the Mavericks install from the App Store. You will want to point UniBeast to the OSX Install partition. You can find detailed usage instructions on UniBeast here if you run into any other issues.
 Select the OSX Install partition in UniBeast. |
 Select Mac App Store Mavericks. |
 Wait for the install to complete. |
UniBeast will say that it will take around 9Mb of space and the time will show as less then a minute. The process will in fact take much more space and time. Once UniBeast completes, it is time to reboot the computer and change the boot order to reflect the usb drive. Once that is done, you should be able to boot to the OSX installer.
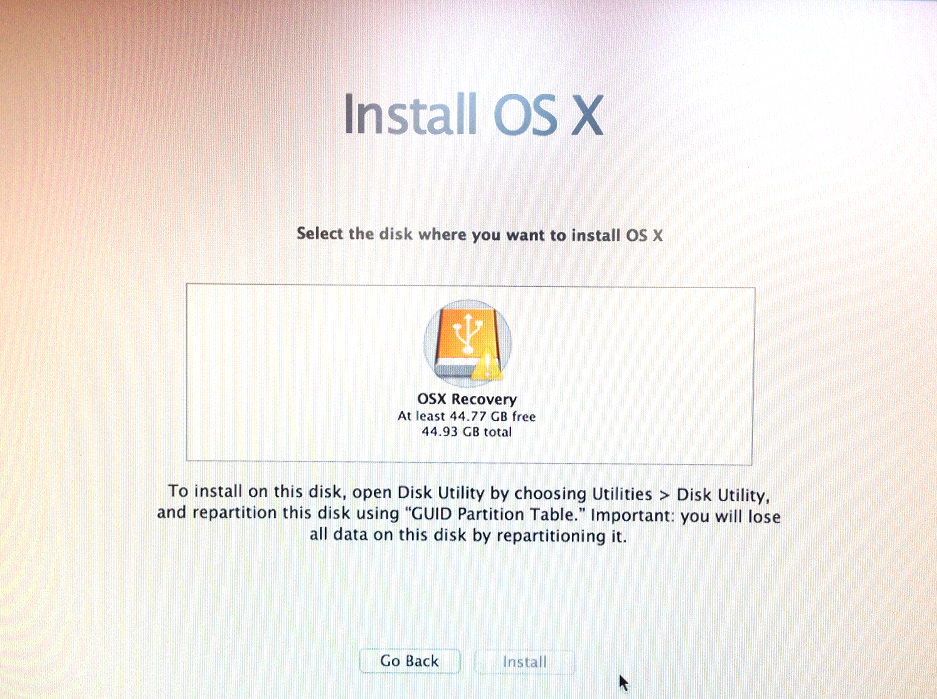
Select OSX Recovery for the install.
Once in the installer, you should be able to select the OSX Recovery drive for the install. Depending on how fast the external drive is, the install could take 10-45 minutes.
The system should reboot itself at some point. You should now be able to see both a boot icon for OSX Install and OSX Recovery. OSX Recovery should now load the new install of OSX, which will need setup with a username and password. Since this is only an install to allow use to have access to a full install of OSX for troubleshooting and repair, you can skip creating an account using your Apple ID. A user of Recovery is sufficient, but you will need to create a password at the very least.
Once you have complete the OOBE (Out of Box Experience), you should be presented with the desktop. From here, you may wish to run MultiBeast and install any drivers that you may require for internet and hard disk access. You can also install Chimera for the boot loader, but you are not required to unless the system fails to boot properly otherwise.
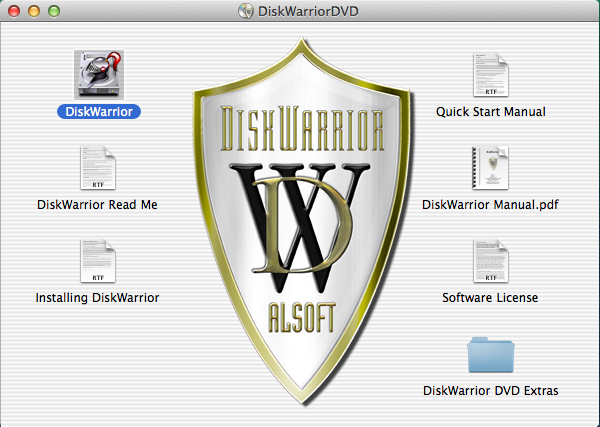
DiskWarrior Installer
At this point, you should have a fully bootable install and recovery partition on the external drive. You may wish to install some additional utilities such as DiskWarrior for that possibility that something could go wrong. If you need something from the App Store, you should have no issues using your Apple ID to download any utilities that you may need.
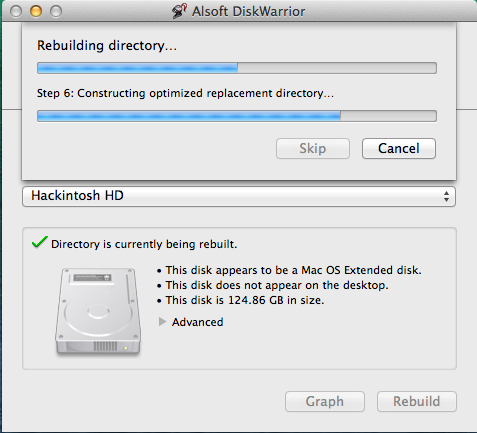
Repairing a corrupt hard drive.
Situations where the recovery install has been used include when a kext is installed in the primary OSX install and has caused the OS to not boot anymore. Another situation that has been fixed by using this method is when a MacDrive issue caused the drive to be deemed un-repairable by OSX, and DiskWarrior was needed to repair this error.
The possibilities are limitless since this is a full install of OSX. The addition of the OSX Install partition allows us to easily reinstall the entire OS if DiskWarrior or another utility is unable to fix the problem. As long as you have been doing Time Machine backups, you should be ready for any potential issue that comes along with running OSX on unsupported hardware.
Finally a fix that works. Simply run the attached file, drag and drop your install ESD into the window and a recovery drive will be created. No need for complicated instructions. Now I wish that someone would post a reboot/shutdown fix that works as well as this!
This works
https://drive.google.com/open?id=0B5NptZunTCbvZHF3WlFDM2tScG8